Listen To This Article In Podcast Format
EQs are crucial tool in shaping the sound of a metal guitar.
It allows guitarists to sculpt their tone, emphasizing desired frequencies while minimizing unwanted ones, to achieve a heavy, clear, and powerful sound that cuts through the mix.
However, EQing heavy metal guitars comes with its own set of challenges and goals, as the genre demands a specific tonal character that balances aggression and clarity.
In this article, we’ll cover how to EQ a metal guitar and go over the best Equalizer settings to make your electic guitar sound like professional.
Understanding the Basics of EQ

EQ is the process of adjusting the balance between different frequency ranges in an audio signal.
The two most common types of EQ used in electric guitar setups are graphic and parametric EQ.
Graphic EQ uses a set of fixed frequency bands, typically divided into octaves, while parametric EQ allows for more precise control over the center frequency, bandwidth, and gain of each band.
When it comes to heavy metal guitar sound, the frequency spectrum can be divided into three main ranges:
| Frequency Range | Description |
|---|---|
| Low Frequencies (20Hz-200Hz) | Responsible for the bass and warmth |
| Mid Frequencies (200Hz-5kHz) | Crucial for the body and character of the guitar |
| High Frequencies (5kHz-20kHz) | Provide clarity, presence, and air |

We’ve been using the FabFilter Pro-Q 3 EQ plugin in our own productions, and it has become an essential part of our mixing process.
Its intuitive interface and versatile features allow us to shape guitar tones with pinpoint accuracy, making it easier to achieve that perfect metal sound.
Get the FabFilter Pro-Q 3 EQ plugin here.
EQ Settings for Different Metal Genres

The EQ settings for electric metal guitar can vary depending on the sub-genre and the desired tonal character.
For example:
- Thrash metal often favors a scooped mid-range with boosted lows and highs for an aggressive, cutting sound
- Death metal tends to have a more balanced EQ with a slight emphasis on the low-mids for a thick, growling tone
- Black metal often has a more trebly, razor-sharp sound with less emphasis on the low-end
Classic metal tones, such as those of Black Sabbath or Judas Priest, often have a more pronounced mid-range compared to modern metal tones, which tend to have a scooped mid-range and boosted lows and highs for a more polished, hyper-aggressive sound.
Step-by-Step Guide to EQing Metal Guitar

- Start with a flat EQ setting on your amp or plugin, with all frequencies set to zero.
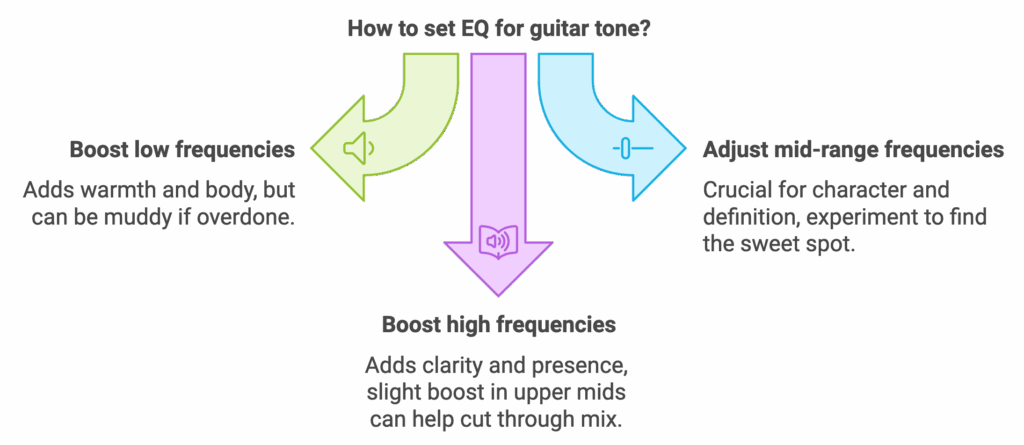
- Begin by adjusting the low frequencies (around 80-200Hz) to add warmth and body to your tone, but be careful not to overdo it, as too much low-end can result in a muddy sound.
- Next, focus on the mid-range frequencies (around 500Hz-2kHz), which are crucial for the character and definition of your guitar sound. Experiment with boosting or cutting different mid-range frequencies to find the sweet spot that enhances your tone without making it sound too harsh or nasal.
- Finally, adjust the high frequencies (around 2kHz-8kHz) to add clarity and presence to your sound. A slight boost in the upper mids can help your guitar cut through the mix, while a gentle high-frequency roll-off can tame any harshness or sibilance.
- When using distortion, be mindful of how EQ can affect the character of your gain. Boosting the mids can help maintain clarity and definition, while scooping the mids can create a more modern, aggressive sound. Experiment with different EQ settings to find the balance that works best for your desired tone.
Advanced Heavy Metal Electric Guitar EQ Techniques
In addition to EQ, other effects like compression and reverb can play a significant role in shaping your metal guitar tone.
Compression
Compression can help even out the dynamics of your playing, adding sustain and punch to your sound, while reverb can add depth and space to your tone.
Experiment with different settings and combinations of these effects to find the perfect balance for your desired sound.
We’ve been using the IK Multimedia Black 76 Limiting Amplifier in our mixes, and it has really improved the quality of our guitar tracks.
Its classic compression adds authority and character, helping our guitars stand out with power and presence.
➡️ Check out the Black 76 Limiting Amplifier here.
Double Tracking
Double-tracking and panning are also powerful techniques for creating a fuller, more immersive metal guitar sound.
By recording the same guitar part twice and panning each track hard left and right, you can create a wide, stereo sound that fills out the mix and adds depth to your tone.
Common Metal Guitar EQ Mistakes to Avoid
- Not Addressing the Source: If the raw guitar track sounds muddy or harsh, it will be more difficult to fix it with EQ alone. Ensure the signal is clean and well-balanced before applying EQ.
- Overusing EQ: Many guitarists tend to overuse EQ to fix problems that should be addressed at the source, such as the amplifier or the cabinet. It’s better to reamp the guitar track if you need to change the character of the tone.
- Ignoring the Amp’s EQ: Some guitarists forget to adjust the EQ on their amp or amp sim before using additional EQ plugins. It’s crucial to set the amp’s EQ to a neutral or flat setting first and then make further adjustments.
- Boosting Too Much: A common mistake is to boost frequencies excessively. Instead, try cutting frequencies that are masking the desired tones. This can make the guitar sound brighter and more defined.
- Not Using High-Pass and Low-Pass Filters: Failing to use high-pass and low-pass filters can result in a muddy or harsh sound. It’s important to cut low frequencies around 80-130Hz and high frequencies above 10kHz to clean up the tone.
- Relying on Stock Plugins: Some guitarists use stock EQ plugins that may not provide the desired tone. Experimenting with different EQ plugins and finding ones that suit your taste is essential.
- Using Too Many EQs: Having too many EQ plugins can be overwhelming and counterproductive. It’s better to limit the number of EQs you use and become familiar with a few that you like.
- Not Using Pre-EQ: Applying EQ before the amp sim can help shape the tone more effectively and prevent issues from becoming more complicated later in the signal chain.
Practical Examples From Popular Songs
To better understand how EQ can shape metal guitar tones, it can be helpful to analyze famous recordings and the settings that might have been used.
For example, the guitar tone on Metallica’s “Master of Puppets” album is known for its scooped mid-range and boosted lows and highs, which creates a powerful, aggressive sound that cuts through the mix.
In contrast, the guitar tone on Pantera’s “Cowboys from Hell” album has a more pronounced mid-range, which gives it a thicker, more muscular sound.
By studying these and other classic metal recordings, you can gain insight into how different EQ settings can be used to achieve specific tonal goals.

Access 4,000+ Music Tools
Access our entire library of music tools including sample packs, VST plugins, DAW templates, and much more.
Additional Resources For EQing Your Electric Guitars and Metal Guitars
There are countless tutorials and video demonstrations available online that can help visual and auditory learners better understand the concepts and techniques of EQing metal guitar.
Some great resources include:
Also, we’ve improved our soloing techniques by following the Session Guitarist Techniques To Improve Guitar Solos course by Altin Gjoni on Skillshare.
It’s packed with practical tips and techniques that have made a noticeable difference in our playing.
Frequently Asked Questions
How Do I Deal With Feedback When EQing Metal Guitar?
Feedback can be a common issue when EQing metal guitar, especially when using high gain settings.
To minimize feedback, try reducing the gain on your amp or plugin, and experiment with different microphone placements and techniques, such as using a noise gate or a feedback suppressor pedal.
How Do I Balance My EQ Settings With The Rest of the Band?
When EQing your metal guitar tone, it’s important to consider how it will fit in with the rest of the band.
Try to carve out a specific frequency range for your guitar that doesn’t compete with the other instruments, and be willing to make adjustments based on the overall mix. Communication with your bandmates and sound engineer can also be helpful in finding the right balance.
Can I Use the Same EQ Settings For Both Rhythm and Lead Guitar?
While you can certainly use the same basic EQ settings for both rhythm and lead guitar, you may want to make some adjustments depending on the specific role and context of each part.
For example, you may want to boost the mids and highs a bit more for lead guitar to help it cut through the mix, while keeping the rhythm guitar a bit more balanced and focused on the low-mids for a tight, punchy sound.
Access over 4,000+ Music Production Tools

Subscribe to SoundShockAudio and access our extensive library of music production tools, including Music Production Apps, Sample Packs, VST Plugins and more.
Take advantage of our comprehensive tools to create music that truly resonates with your audience.
If you are still having trouble with EQing, check out the rest of our EQ articles:


Loving the breakdown on EQ settings for different metal genres, Daniel! Was super helpful for my latest project. Gotta say, it’s tricky finding the right vibe, but this guide is a great starting point.
hey, was reading about eq settings for different metal genres. got kinda lost with the highs and lows. can someone break it down a bit simpler? wanna make sure I get it right for my setup. cheers
Ricky, think of the lows as the ‘oomph’ in your sound and the highs as the ‘shine’. For heavier genres, you might want more oomph, but don’t neglect the shine to cut through the mix.
hey, so i tried the eq settings you suggested for thrash metal, didn’t quite get the punch i was lookin for. any tips on pumpin up the aggression without muddying the sound too much?
Strumlord83, try dialing back on the low-mids a bit and push the upper mids slightly. It can help cut through the mix more without adding muddiness. Works for bass too!
Regarding the recommendation for high-quality EQ VST plugins, I believe there are free options out there that can match the performance of premium versions. It’s all about knowing how to use them effectively.
Not sure I agree with all the EQ settings here. Some genres like doom metal need a warmer, bass-heavy sound that wasn’t quite covered. Maybe it’s a matter of taste, but it’s crucial to not overlook the diversity within metal.
I really appreciated the step-by-step guide to EQing metal guitar. Made a huge difference in my home recordings. Thanks, Daniel!
Interesting points on advanced techniques. I believe experimenting with different EQ settings is key to understanding how they affect the guitar tone in a mix. It’s all about trial and error.
so everyone thinks just by tweaking some EQ settings they gonna sound like Metallica? guess what, it takes more than that, you gotta have the feel, which i doubt you get from plugins
I get your point, but technology really helps bridge the gap. You’d be surprised at how close you can get with the right tools and practice. It’s all part of the journey.
Haha, tried to mess with EQ settings and ended up making my guitar sound like a dying whale. Guess I’ll leave the advanced stuff to the pros!
how do i deal with feedback when playing loud? its always a mess when i try to play anything that’s got some real power behind it
Got to say, some of these EQ tips seem way off. My experience has taught me the complete opposite, especially for live settings. Not all venues will play nice with these settings.
One point of contention I have with the ‘Advanced Techniques’ section is the oversimplification of mid-scoop for all metal genres. While it’s a popular move, it’s crucial to understand the context within the mix. Removing too much mid-range can make your guitar disappear in full band settings, especially live.
Daniel, the step-by-step guide to EQing metal guitar is spot on. It’s rare to find such specific advice. Implemented some of your suggestions, and the difference is night and day. Cheers!
I found the ‘Practical Examples and Case Studies’ section incredibly helpful. Being able to see real-world applications of EQ settings can be a game-changer for understanding how to adapt to different venues.
Regarding the section on common EQ mistakes to avoid, could you delve a bit deeper on why scooping the mids is typically frowned upon? I see this advice often but with little explanation on the reasoning.
It’s because scooping the mids can make your guitar disappear in the mix, especially with bass and drums fighting for space. Mids help your guitar stand out.
Exactly, RiffMasterRick. Plus, live settings often lack the fidelity of studio recordings, making mid frequencies even more crucial for clarity and presence on stage.
anyone else think some of these EQ settings are too generic? like, it works, but to really stand out, you gotta tweak and find your own sound.