Plosives are a common issue in vocal recordings that can significantly impact audio quality.
These abrupt, explosive sounds are caused by the release of built-up air pressure when pronouncing certain consonants, resulting in a popping or thumping noise that can be distracting to listeners.
EQs are a powerful tool that can help mitigate the impact of plosives on vocal recordings, ensuring a cleaner and more professional sound.
Understanding Plosives in the Human Voice
Plosives are consonant sounds produced by completely blocking the airflow in the vocal tract, followed by a sudden release of air.
Common consonants that produce plosives include:
- “P” and “B” (bilabial plosives)
- “T” and “D” (alveolar plosives)
- “K” and “G” (velar plosives)
When these sounds are pronounced, the burst of air can cause the microphone’s diaphragm to overload, resulting in a loud, low-frequency pop or thump in the recording.
Preventative Measures To Get Rid of Plosives

Before diving into EQ techniques, it’s essential to take preventative measures to get rid of plovises before they even end up in your recording.
Proper microphone technique and positioning can significantly reduce the impact of plosives:
- Position the microphone slightly off-axis, so the burst of air doesn’t hit the diaphragm directly
- Maintain a consistent distance between the vocalist and the microphone
Pop filters and wind screens act as physical barriers that disperse the airflow, reducing the intensity of plosives before they reach the microphone.
Vocalists can also employ techniques to naturally reduce plosives:
- Slightly turning their head when pronouncing plosive-heavy words
- Controlling the amount of air released when pronouncing problematic consonants
EQ Techniques for Getting Rid Plosives
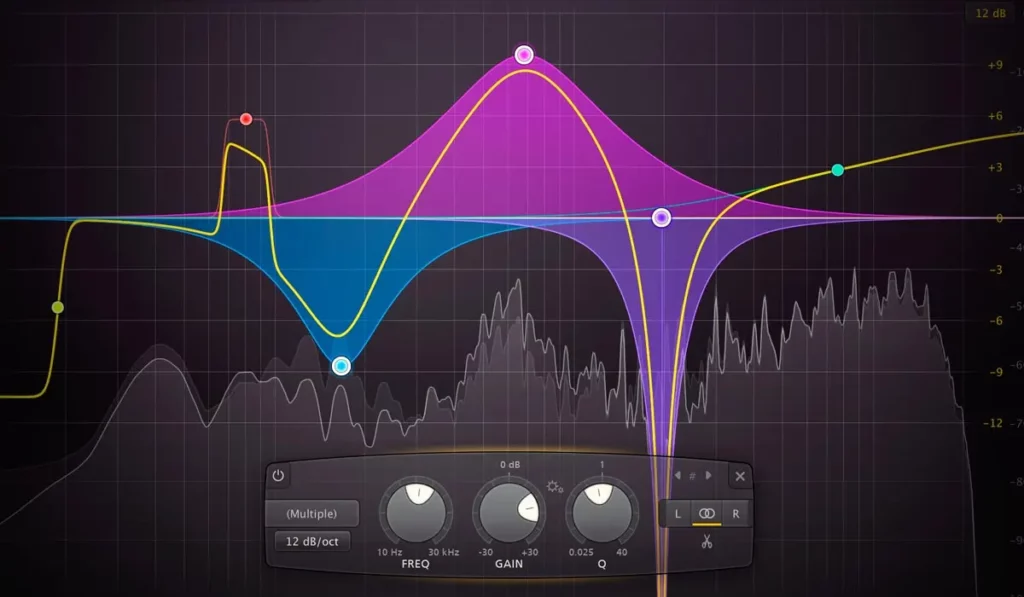
When it comes to removing plosives, two main types of EQ are particularly useful:
- High-pass filters: These filters attenuate frequencies below a specified cutoff point, effectively reducing low-frequency rumble caused by plosives.
- Dynamic EQs: These EQs apply gain reduction to specific frequency bands only when the signal exceeds a set threshold, allowing for more precise control over problematic frequencies.
To use a high-pass filter for plosive removal:
- Identify the frequency range where the plosives are most prominent (typically between 80-200 Hz)
- Set the high-pass filter’s cutoff frequency just above this range
- Adjust the filter’s slope (measured in dB/octave) to achieve the desired amount of attenuation
Dynamic EQs offer a more targeted approach:
- Set the dynamic EQ to focus on the specific frequency range affected by the plosives
- Adjust the threshold so that the EQ only engages when the plosive occurs
- Set the amount of gain reduction to taste, ensuring that the plosive is attenuated without adversely affecting the overall vocal quality
EQ Cheat Sheet for Vocal EQing
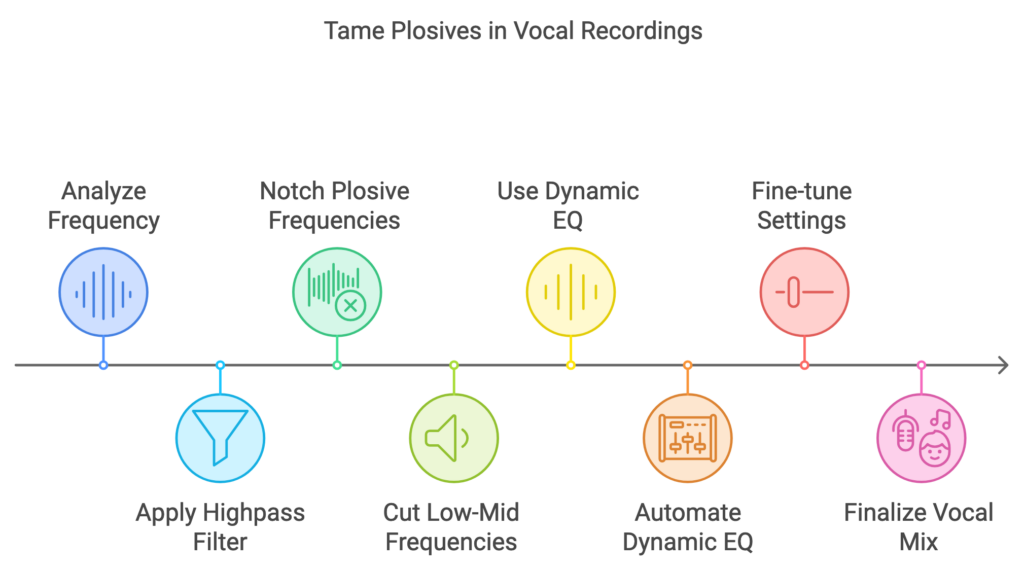
Here is the plosive EQ cheat sheet in a markdown table format:
| Technique | Frequency Range | Notes |
|---|---|---|
| Highpass Filter | 80-120 Hz | Use a steep 18-24 dB/octave slope to remove low rumble and mud |
| Notch Plosive Frequencies | 100-300 Hz | Use a narrow Q of 1-2 to precisely target plosives Cut by 3-6 dB where plosives are most prominent |
| Low-Mid Cut | 200-400 Hz | Apply a wide 3-6 dB cut in this range to soften plosives |
| Dynamic EQ | Around 150-250 Hz | Set a narrow Q of 1-2 Increase ratio to 4:1 or higher to significantly reduce plosives Automate to only engage on plosive sounds |
The exact frequencies will vary based on the vocalist, microphone, and room acoustics. Use a frequency analyzer to pinpoint problem areas and make narrow cuts or dynamic EQ moves to tame plosives.
🏆 Our Favorite VST for EQing Out Plosives
We’ve found that FabFilter Pro-Q 3 is an excellent choice for EQing out plosives.
This EQ is soooo percise and transparent, so it is perfect for any type of corrective EQing.
There is a reason that this EQ plugin has been one of the best on the market for over a decade.
Advanced EQ Strategies
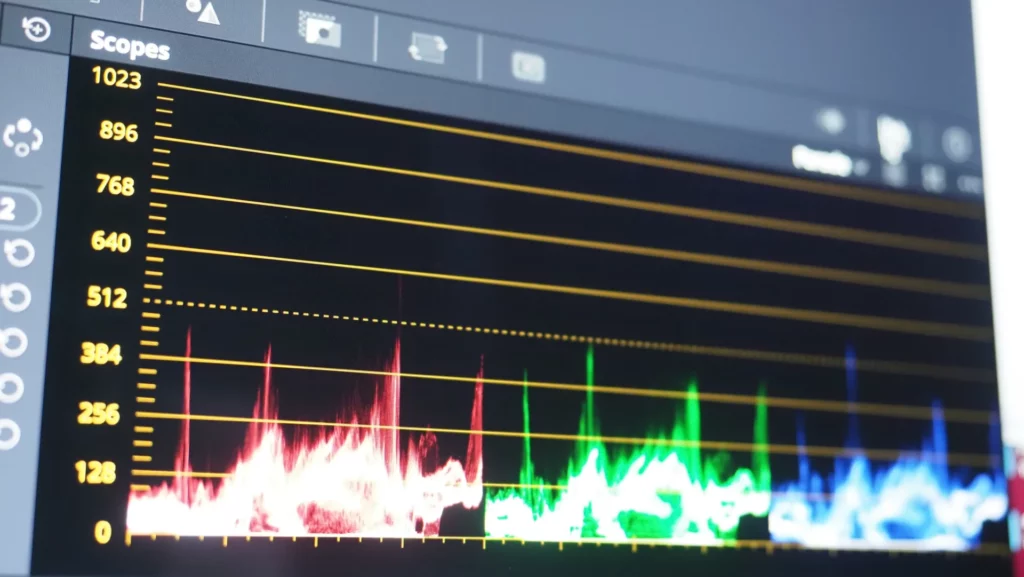
If you are still having issues with plosives in your vocals, here are a few more advanced techniques you can use:
Frequency Sweeps
Frequency sweeps involve gradually adjusting the frequency of a narrow EQ band while boosting its gain, allowing you to pinpoint the exact frequencies where plosives are most prominent.
Once identified, you can apply targeted attenuation to those specific frequencies.
EQ Automation
Automating EQ settings can provide dynamic control over plosive frequencies throughout the recording.
By creating automation points, you can adjust the EQ parameters in real-time, ensuring that plosives are attenuated only when necessary, preserving the natural character of the vocal performance.

Access 4,000+ Music Tools
Access our entire library of music tools including sample packs, VST plugins, DAW templates, and much more.
How To Get Rid of the S Sound in Vocals
One common issue that producers have when mixing vocals is taming the harsh “S” sound. While the S sound is not a plosive, the corrective mixing of this “S” sound is usually done when EQing plosives.
Here is a quick rundown on how you can get rid of the “S” sound in your vocals.
To get rid of the “S” sound (sibilance) in vocal recordings, follow these steps:
1. Use a De-Esser
- Insert a De-Esser Plugin: Most DAWs have built-in de-esser plugins.
- Adjust the Threshold: Set the threshold so that the de-esser activates only when sibilance occurs.
- Set the Frequency Range: Typically target the 4-10 kHz range where sibilance is most prominent.
- Fine-Tune Reduction: Adjust the amount of gain reduction to achieve a natural sound without over-reducing.
🏆 Our Favorite De-Esser VST Plugin
We’ve found that the FabFilter Pro-DS is one of the best out there.
The algorithms it uses to detect parts of the vocal that need de-essing are excellent.
Also the control you have over the de-essed vocal is second to none.
Its intuitive interface makes it easier for us to pinpoint and address problematic frequencies effectively.
2. Manual EQ
- Insert an EQ Plugin: Use a parametric EQ.
- Identify the Sibilant Frequencies: Sweep through the higher frequencies to isolate where the sibilance is strongest.
- Narrow Band Reduction: Apply a narrow Q cut at the identified frequencies, usually around 4-10 kHz.
3. Dynamic EQ
- Insert a Dynamic EQ Plugin: Similar to a standard EQ but with dynamic control.
- Set the Target Frequencies: Focus on the sibilant range, around 4-10 kHz.
- Adjust Threshold and Ratio: Set the dynamic EQ to reduce gain only when sibilance occurs.
4. Automate Volume
- Manual Automation: Manually reduce the volume of the “S” sounds within your DAW’s automation lane.
- Precision Control: This method allows for very precise control but is more time-consuming.
5. Use Proper Microphone Technique
- Placement: Position the microphone slightly off-axis or use a pop filter to minimize sibilance.
- Distance: Maintain an appropriate distance from the microphone.
By using these techniques, you can effectively reduce or eliminate sibilance and achieve a cleaner vocal recording.
Additional Tools and Techniques
In addition to EQ, de-essing tools can be effective in reducing the impact of plosives.
While primarily designed to attenuate sibilance (“S” and “SH” sounds), de-essers can also help tame plosives when set to target the appropriate frequency range.
Third-party software plug-ins, such as iZotope RX or Waves DeBreath, offer dedicated tools for plosive removal.
💙 We also love Nectar 4 by iZotope for ALL your vocal mixing needs. We use this all the time with Pro 3 and Pro-DS as it really gives you full control over every aspect of the vocal. Even adding in harmonies!
These plug-ins often employ advanced algorithms and spectral editing capabilities to identify and attenuate plosives with minimal manual intervention.
Some practical tips include:
- Start with gentle EQ adjustments and gradually increase the intensity as needed
- Be mindful of the proximity effect, which can exacerbate low-frequency plosives when the vocalist is close to the microphone
- Use high-resolution visual feedback, such as spectrograms, to help identify plosive frequencies more accurately
Other Resources To Help You EQ Vocals
For further exploration of EQ techniques and vocal recording best practices, consider the following resources:
- “Mixing Secrets for the Small Studio” by Mike Senior
- “The Mixing Engineer’s Handbook” by Bobby Owsinski
- “The Recording Engineer’s Handbook” by Bobby Owsinski
- Waves Audio’s “Vocal Production Tips & Tricks”
These resources offer in-depth insights and practical advice for optimizing your vocal recordings and EQing.
Access over 4,000+ Music Production Tools

Subscribe to SoundShockAudio and access our extensive library of free music production tools, including Music Production Apps, Sample Packs, and more.
Take advantage of our comprehensive tools to create music that truly resonates with your audience.
Check out all our other articles on EQing other instruments.



Hey Daniel, great piece on EQ techniques for plosives! I’m kinda new to mixing vocals and was wondering, how can you tell if you’ve overdone it with EQ? Don’t wanna make the vocals sound unnatural. Thanks!
really appreciated the part about using a de-esser for the S sounds, that’s always been a tricky part for me. gonna try these tips out on my next track, hope it makes a difference!
Not sure if I agree with the frequency sweeps method you suggested, Daniel. There’s a risk of making the vocal too thin if not done correctly. Isn’t it better to use dynamic EQ for more control?
Ted90 has a point here, dynamic EQ can indeed provide more precision without compromising the natural tone of the vocals. Frequency sweeps are useful but require a careful hand.
Glad to see I’m not the only one who thinks that, JessieK. It’s all about finding that balance and what works best for the mix. Cheers for the input!
so if i use all these EQ tricks will my vocals finally not sound like a kazoo? asking for a friend lol
Daniel, this is gold! Especially excited about trying those EQ VST plugins. Quality EQ can really make or break a track. Cheers for the detailed guide.
Interesting article, Daniel. I never considered how critical proper EQ is for getting rid of plosives and the S sounds. I’ll need to experiment with these techniques in my setup.