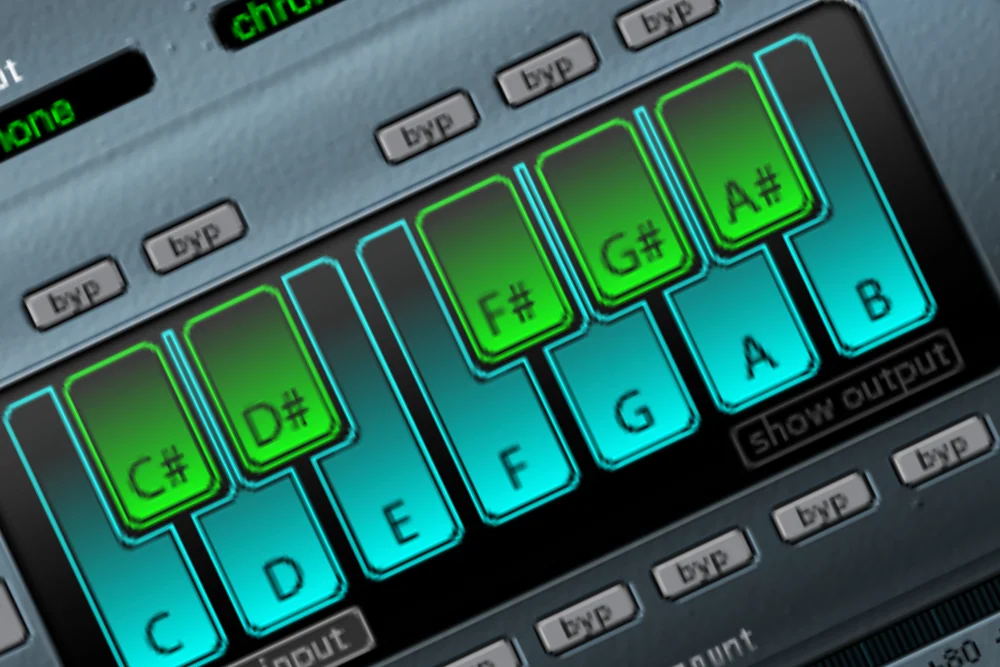
You’re aware that autotune can make or break a song.
You’ve got Logic Pro X but you’re unsure how to use its autotune feature. Don’t worry, you’re not alone.
With this guide, you’ll master the art of pitch correction, understand the difference between Flex Pitch and Autotune, and even troubleshoot common issues.
So, let’s dive into the technical, yet exciting world of autotune in Logic Pro X.
Key Takeaways
– Autotune is a real-time pitch processor used to tune the pitch of a sound.
– Logic Pro’s autotune plugin is called Pitch Correction and can be found in the Pitch folder of the plugin drop-down menu.
– Third-party autotune plugins like Antares Auto-Tune Access and Waves Tune Real-Time offer more control and better audio quality than Logic Pro’s autotune.
– Flex Pitch is a built-in tool in Logic Pro for pitch correction and offers control over individual notes, formant, gain, pitch-drift, and vibrato.
Introduction to Autotune and Pitch Correction in Logic Pro
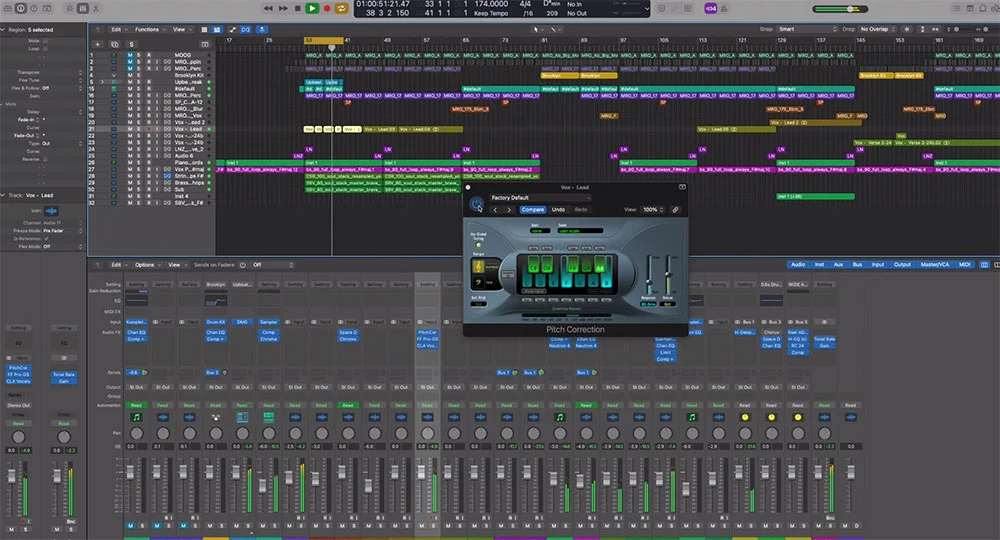
Before you can master Autotune in Logic Pro X, it’s crucial to comprehend its role in music production. While familiarizing yourself with pitch correction, you might also want to understand why singers use Auto-Tune in various genres.
In essence, Autotune is a real-time pitch processing tool that can subtly or dramatically alter the pitch of a sound.
Understanding pitch correction, a related process that adjusts the pitch of a sound to match a specific scale or key, will further enhance your music production skills.
Understanding the Basics of Autotune
While you might be familiar with the term ‘autotune’, understanding its core functionality and how it’s used in Logic Pro X is essential to harnessing its full potential in your music production.
In Logic Pro X:
– Autotune is known as ‘Pitch Correction’
– It’s a built-in plugin
– It can subtly or drastically correct pitch
Understanding the basics of autotune will enhance your musical creativity and precision.
The Role of Pitch Correction in Music Production
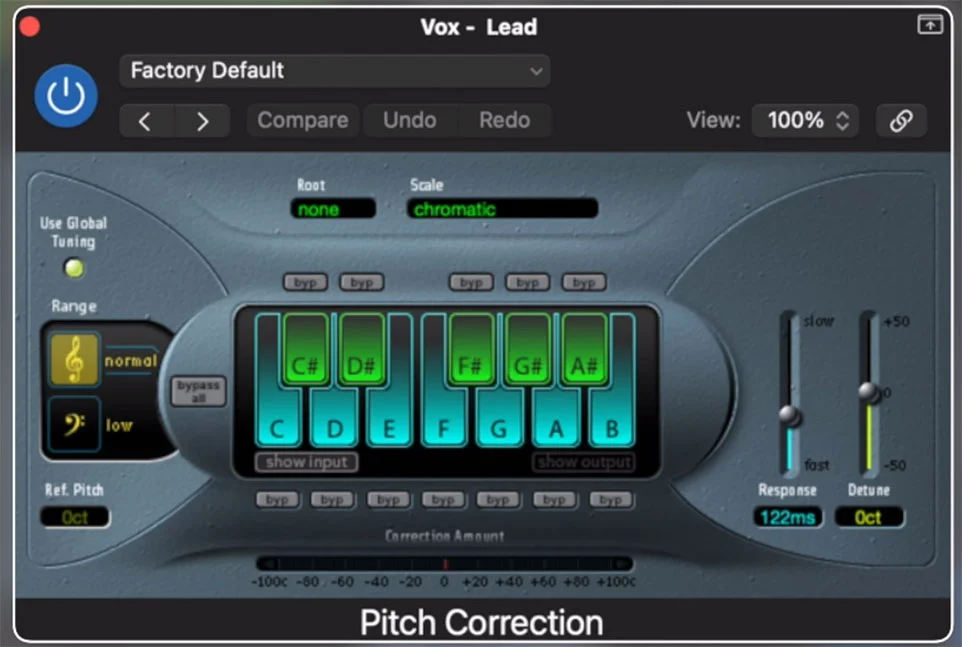
You need to understand that pitch correction, or autotune as it’s commonly known, plays a crucial role in modern music production, especially in genres like pop, hip-hop, and electronic music.
The Logic Pro X pitch correction, an industry standard, is a highly efficient tool for this process. Learning how to use autotune in Logic Pro X, with its auto-tune plugin and pitch correction plugin, is essential in music production.
Getting Started with Autotune in Logic Pro X
To initiate your journey with Autotune in Logic Pro X, first set up your project to accommodate the pitch correction process.
This involves selecting and familiarizing yourself with the right pitch correction plugins that Logic Pro X has to offer. Remember, your choice of plugin can significantly impact the quality of your sound output.
Setting Up Autotune for Your First Project
Let’s dive into setting up autotune for your first project in Logic Pro X.
* First, open your Logic Pro and navigate to ‘Plug-ins’.
* Select the ‘Autotune’ plugin from the list and apply it to your desired track.
* Adjust the settings on the Autotune plugin according to your project’s requirements.
Choosing the Right Pitch Correction Plug-in
Choosing the right pitch correction plugin is a crucial step in getting started with autotune in Logic Pro X. You can use Logic’s stock autotune, ‘Pitch Correction’, or opt for a third-party plugin.
Your choice should align with your musical needs and budget. Remember, each plugin varies in its capabilities, so testing and experimenting with different plugins can ensure you find your perfect pitch correction solution.
Detailed Walkthrough: Using Autotune in Logic Pro
Let’s now step into the intricacies of using Autotune in Logic Pro. We’ll guide you through a detailed step-by-step process to tune your vocal track, ensuring you grasp every nuance.
Additionally, we’ll explore advanced techniques for pitch correction, arming you with the skills to maneuver this tool efficiently.
Step-by-Step Guide to Tuning Your Vocal Track
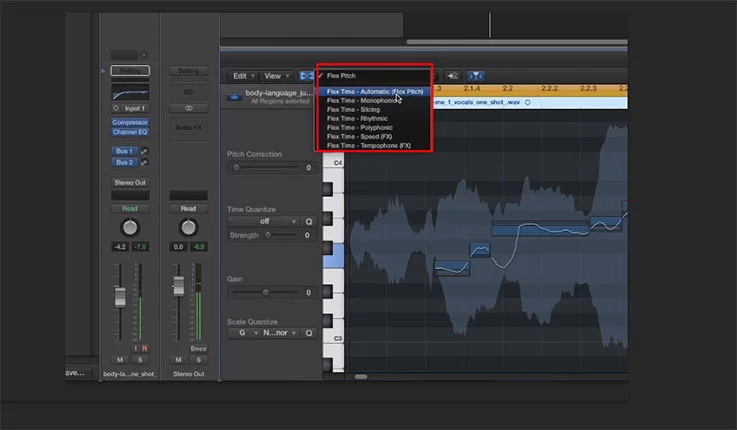
To start tuning your vocal track in Logic Pro X, you’ll first need to load the Pitch Correction plugin onto the track’s channel strip. Here’s your step-by-step guide to tuning your vocal track:
– Enable ‘Flex Pitch’
– Choose ‘Pitch Correction’ from audio effects
– Set your tune parameters
– Apply auto-tune effect
Using Logic Pro, you can masterfully tune your vocal tracks to perfection.
Advanced Techniques for Pitch Correction in Logic Pro X
Now that you’ve mastered the basics of tuning your vocal track in Logic Pro X, it’s time to delve into some of the more advanced techniques for pitch correction using autotune.
Explore the Autotune and Flex Pitch interfaces to refine pitch correction in Logic Pro X.
Experiment with different pitch quantization grids, making subtle or dramatic changes with Autotune.
For granular control, use the Flex Pitch interface to make precise adjustments to individual notes.
Flex Pitch vs. Autotune: When to Use Each Tool in Logic Pro

When considering pitch correction in Logic Pro X, you’re faced with two primary tools: Flex Pitch and Autotune. Each tool has its strengths, and understanding these can help you make an informed decision on when to use each.
Let’s explore the nuances of Flex Pitch and Autotune, comparing their use for different vocal styles.
Flex Pitch: A Deep Dive into Logic Pro’s Manual Tuning Tool
You’ll find that Flex Pitch in Logic Pro X is an incredibly powerful tool for manual tuning, offering a deeper level of control compared to autotune.
Flex Pitch enables precise manipulation of the pitch of individual notes within an audio file. It’s ideal for detailed pitch correction work. Compared to autotune, Flex Pitch provides a more subtle, refined tuning approach.
It’s an essential tool for creating professional-quality audio in Logic Pro X.
Comparing Autotune and Flex Pitch for Different Vocal Styles
In choosing between Autotune and Flex Pitch in Logic Pro X, it’s important to consider the specific vocal style you’re working with, as each tool offers distinct advantages.
Use Autotune in Logic Pro X for a stylistic choice, characterized by the iconic Antares Auto-Tune sound.
For precise control over a vocalist’s pitch, turn to Flex Pitch.
Comparing Autotune and Flex Pitch, your choice should align with your desired vocal style.
Exploring Third-Party Autotune Plugins for Logic Pro
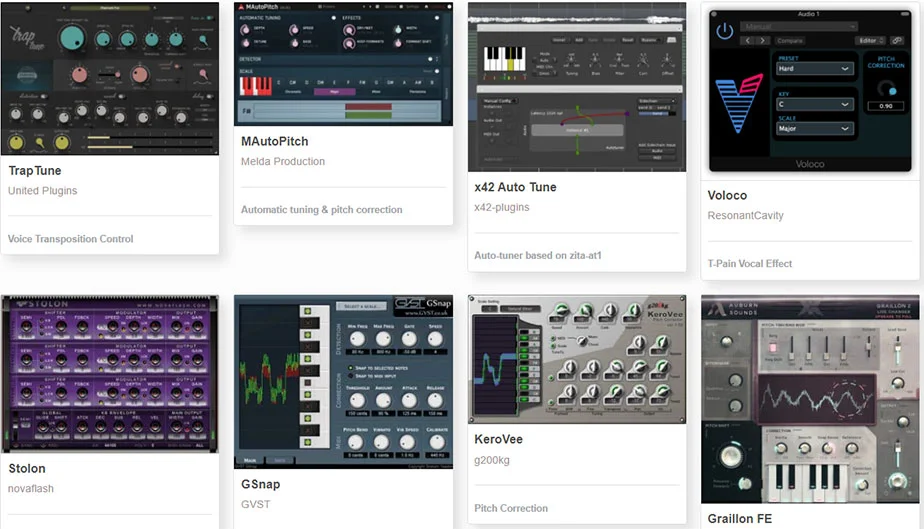
Let’s now turn our attention to third-party autotune plugins that can enhance your experience with Logic Pro. While discussing plugins like Antares Auto-Tune, it’s also worth checking out these free Auto-Tune VST plugins for additional options.
One such plugin is Antares Auto-Tune, renowned for its advanced features and benefits.
This discussion will also evaluate alternative autotune plugins, providing you with a comprehensive understanding of the tools at your disposal.
Antares Auto-Tune for Logic Pro: Features and Benefits
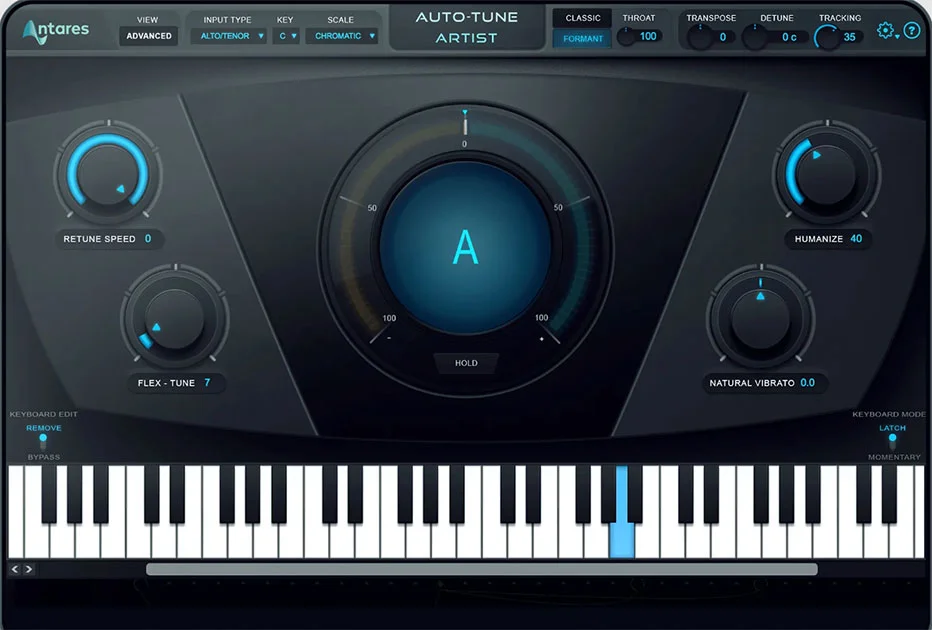
Now, if you’re looking for more control and precision in pitch correction, Antares Auto-Tune is a third-party plugin that offers several features and benefits.
– *Unique Flex-Tune innovation* for more natural and transparent pitch correction.
– *Ultra-Low Latency Mode* for real-time performance.
– *Customizable Retune Speed control* to fine-tune your autotune settings.
– *Humanize function* for pitch correction that maintains expressiveness.
These features make it easy to use autotune in Logic Pro X and enhance your audio quality.
Evaluating Alternative Autotune Plugins for Logic Pro Users
While Antares Auto-Tune offers quite a few advanced features, there are several other third-party autotune plugins you might want to consider for enhancing your work in Logic Pro X. When evaluating, ponder on your specific needs. Here’s a brief comparison:
| Plugin | Special Feature |
|---|---|
| Waves Tune Real-Time | Zero-latency |
| Melodyne 5 | Polyphonic Pitch Correction |
| MAutoPitch | Free, with sophisticated controls |
| iZotope Nectar 3 | Included Vocal Assistant |
| Celemony AutoTune | Advanced Graph Mode |
Each plugin brings unique capabilities, so choose wisely.
Practical Tips for Using Autotune in Logic Pro
As you begin to master Autotune in Logic Pro, consider the timing of your Autotune application. Understanding the differences between real-time and post-production application can greatly affect your output.
Additionally, knowing how to achieve natural-sounding pitch correction can ensure your tracks maintain their organic quality while still benefiting from pitch perfection.
Real-Time vs. Post-Production Autotune Application
In your journey to master autotune in Logic Pro X, you’ll face two main application methods: real-time and post-production.
* Real-time autotune application allows for instant pitch correction during recording.
* Post-production autotune application is used after recording for fine-tuning.
* Auto-Tune Pro and Antares Autotune are popular pitch correction plug-ins.
* Both methods require understanding of auto-tuning principles for effective use in Logic Pro X.
How to Achieve Natural-Sounding Pitch Correction with Autotune
Now that you’re familiar with both real-time and post-production autotune application, let’s dive into how you can achieve natural-sounding pitch correction using autotune in Logic Pro X. A method called pitch correction, combined with flex pitch, allows you to manually correct notes. The auto-tune access parameter helps you to fine-tune for a more natural sound.
| Tool | Use | Benefit |
|---|---|---|
| Pitch Correction | Correct off-pitch notes | Instant, automatic tuning |
| Flex Pitch | Manually adjust notes | Detailed, precise control |
| Auto-Tune Access | Fine-tune adjustments | Achieve natural-sounding vocals |
Troubleshooting Common Autotune Issues in Logic Pro X
While using Autotune in Logic Pro X, you may encounter common issues such as latency and artifacts. These can often be resolved by fine-tuning your Autotune settings for optimal performance.
Let’s discuss how to troubleshoot these issues and optimize your Autotune experience in Logic Pro X.
Addressing Latency and Artifact Problems in Autotune
Facing latency and artifact problems during your autotune process can be a frustrating experience, but there are ways to troubleshoot these common issues in Logic Pro X.
– Ensure your plug-in buffer size is optimized.
– Check that your input signal is clean and clear.
– Investigate any issues with your vocal recordings.
– Regularly update Logic Pro X to ensure optimal functioning of autotune.
Fine-Tuning Autotune Settings for Optimal Performance
To ensure optimal performance from your autotune settings in Logic Pro X, it’s crucial to understand how to fine-tune these settings and troubleshoot common issues that might arise. Use the response slider to adjust pitch correction speed and Flex Pitch for precise control.
| Common Issue | Solution |
|---|---|
| Too robotic | Lower the response |
| Off-key notes | Use Flex Pitch |
| Latency | Increase buffer size |
| No effect | Check plugin bypass |
| Unwanted artifacts | Fine-tune correction amount |
Master these, and you’ll overcome most autotune challenges.
Final Thoughts on Using Autotune in Logic Pro X
Mastering Autotune in Logic Pro X requires consistent practice and fine-tuning of your workflow. As you continue to integrate this tool into your work, remember to experiment with its settings to achieve the desired sound.
With time, you’ll see noticeable improvements in your pitch correction skills, enhancing the overall quality of your audio productions.
Best Practices for Integrating Autotune into Your Workflow

Often, you’ll find that integrating autotune into your workflow can significantly enhance your music production process, especially when you’re working with vocals.
Here are some best practices:
– Always use autotune subtly to maintain vocal authenticity.
– Experiment with different autotune settings for unique vocal effects.
– Regularly update your Logic Pro X for latest autotune features.
– Stay updated with music industry trends to know when and how to use autotune.
How to Continuously Improve Your Autotune Skills
Improving your autotune skills in Logic Pro X is a continuous process that involves regular practice, experimentation, and staying informed about the latest technology and trends.
Utilize both the stock plugin and plug-ins available like Antares for varied results.
Learn to fine-tune vocals using Flex Pitch.
Continually strive to improve your skills, exploring new methods of using the stock plugin to your advantage.
FAQ
What is the role of Antares in using autotune in Logic Pro X?
Antares is the company that developed Auto-Tune, a pitch correction software plug-in. Its used in Logic Pro X for correcting intonation and vocal timing issues or creatively modifying the pitch of audio tracks.
How to set up Autotune from Antares in Logic Pro X?
To set up Autotune, you should first install it as an AU (Audio Units) plugin. Then, launch Logic Pro X and open your project. Click on Mix at the top menu and select Show Mixer, click on an empty Audio FX slot under the audio track and find your installed Autotune plugin.
How does latency affect the use of autotune in Logic Pro X?
Latency can cause a delay between when you sing or play a note and when you hear it back through AutoTune. Higher buffer size settings increase latency but provide more processing power for plugins like AutoTune. Lowering buffer size reduces latency but requires more CPU resources.
How to adjust Autotune settings for minimal attention distraction while working on Logic Pro X?
You can adjust parameters like Retuning Speed or Humanize to maintain a natural sound which will keep listeners attention focused on music rather than noticing any autotuning effect. Also, keeping your workspace organized can help minimize distractions while adjusting these settings.
How do I correct latency issues when using Autotune in Logic Pro X?
If experiencing noticeable lag due to high latency, try reducing your buffer size under Preferences Audio Devices IO Buffer Size. However, be aware that smaller buffer sizes may cause clicks, pops or errors if your system cannot handle it. Using Low Latency Mode might also help with reducing delays during recording.
Final Thoughts
Polishing your performance with pitch-perfect precision is possible with Logic Pro X’s powerful autotune plugin. As you explore its capabilities, you might be curious about its origins in music; learn about the first song to use Auto-Tune and how it transformed the music industry.
By patiently practicing and perfecting your prowess in pitch correction, you can confidently combat common audio issues and create captiBest Practices for Integrating Autotune into Your Workflowvating compositions.
Remember, the key to killer tracks lies in learning, leveraging, and loving the tools at your disposal.
So, continue to conquer the challenges of autotune in Logic Pro X and create your own audio masterpieces.


